Embark on your journey into game development with this fun and easy tutorial on creating a classic Snake game using web technologies! This guide will walk you through the steps to build your own interactive game directly in your web browser using HTML, CSS, and JavaScript. No prior game development experience is needed – just a basic understanding of web coding will get you started.
What You’ll Need
Before we begin coding our HTML snake game, ensure you have the following:
- A Text Editor: For writing your HTML, CSS, and JavaScript code. VSCode, Sublime Text, or Atom are excellent choices.
- A Web Browser: To open and play your game. Chrome, Firefox, or Safari will work perfectly.
- Basic Knowledge of HTML, CSS, and JavaScript: Familiarity with these languages will help you understand the code and customize your game.
Setting Up Your HTML File
First, create a new file named snake.html (or any name you prefer with the .html extension). This file will structure the game and link our JavaScript code. Paste the following basic HTML structure into your snake.html file:
<!DOCTYPE html>
<html>
<head>
    <title>HTML Snake Game</title>
    <style>
        /* CSS styles will go here */
    </style>
</head>
<body>
    <canvas id="gameCanvas" width="400" height="400"></canvas>
    <script>
        /* JavaScript code will go here */
    </script>
</body>
</html>
Here’s a breakdown:
<!DOCTYPE html>: Declares the document type as HTML5.<html>: The root element of the HTML page.<head>: Contains meta-information like the title and CSS styles.<title>: Sets the title that appears in the browser tab.<style>: We’ll add CSS here to style our game canvas.
<body>: Contains the visible content of the page.<canvas id="gameCanvas" width="400" height="400">: This is the HTML5 canvas element where our game will be drawn. We give it anidof “gameCanvas” to easily access it with JavaScript and set its width and height to 400 pixels.<script>: We’ll write our JavaScript code here to handle game logic and drawing.
Styling the Canvas with CSS (Optional but Recommended)
Let’s add some basic CSS to make our canvas visually clearer. Place the following CSS code within the <style> tags in your snake.html file:
body {
    display: flex;
    justify-content: center;
    align-items: center;
    height: 100vh;
    margin: 0;
    background-color: #f0f0f0;
}

#gameCanvas {
    background-color: #e0e0e0;
    border: 1px solid #333;
}
This CSS code does the following:
- Centers the canvas on the page horizontally and vertically.
- Sets a light gray background color for the body.
- Styles the
gameCanvas:- Sets a slightly darker gray background.
- Adds a 1-pixel solid border for better visibility.
JavaScript for Game Logic
Now for the exciting part – making the game work with JavaScript! Add the following JavaScript code within the <script> tags in your snake.html file:
const canvas = document.getElementById('gameCanvas');
const ctx = canvas.getContext('2d');

const gridSize = 20; // Size of each grid cell
let snake = [{ x: 10, y: 10 }]; // Initial snake position
let food = {}; // Food position
let direction = 'right'; // Initial direction
let score = 0; // Game score
let gameLoop; // Variable to control the game loop

function generateFood() {
    food = {
        x: Math.floor(Math.random() * (canvas.width / gridSize)),
        y: Math.floor(Math.random() * (canvas.height / gridSize))
    };
}

function draw() {
    ctx.fillStyle = '#f0f0f0'; // Background color
    ctx.fillRect(0, 0, canvas.width, canvas.height);

    // Draw food
    ctx.fillStyle = 'red';
    ctx.fillRect(food.x * gridSize, food.y * gridSize, gridSize, gridSize);

    // Draw snake
    ctx.fillStyle = 'green';
    snake.forEach(segment => {
        ctx.fillRect(segment.x * gridSize, segment.y * gridSize, gridSize, gridSize);
    });

    // Display score
    ctx.fillStyle = 'black';
    ctx.font = '16px Arial';
    ctx.fillText('Score: ' + score, 8, 20);
}

function update() {
    const head = { x: snake[0].x, y: snake[0].y };

    switch (direction) {
        case 'up': head.y--; break;
        case 'down': head.y++; break;
        case 'left': head.x--; break;
        case 'right': head.x++; break;
    }

    // Check for collision with walls
    if (head.x < 0 || head.x >= canvas.width / gridSize || head.y < 0 || head.y >= canvas.height / gridSize) {
        gameOver();
        return;
    }

    // Check for collision with itself
    for (let i = 1; i < snake.length; i++) {
        if (head.x === snake[i].x && head.y === snake[i].y) {
            gameOver();
            return;
        }
    }


    snake.unshift(head); // Add new head

    // Check if snake ate food
    if (head.x === food.x && head.y === food.y) {
        score++;
        generateFood();
    } else {
        snake.pop(); // Remove tail segment if no food eaten
    }
}

function gameOver() {
    clearInterval(gameLoop);
    alert('Game Over! Score: ' + score);
    snake = [{ x: 10, y: 10 }]; // Reset snake
    direction = 'right'; // Reset direction
    score = 0; // Reset score
    generateFood(); // Generate new food
    startGame(); // Restart game
}


function startGame() {
    generateFood();
    gameLoop = setInterval(() => {
        update();
        draw();
    }, 100); // Game speed (milliseconds)
}


document.addEventListener('keydown', (event) => {
    switch (event.key) {
        case 'ArrowUp': if (direction !== 'down') direction = 'up'; break;
        case 'ArrowDown': if (direction !== 'up') direction = 'down'; break;
        case 'ArrowLeft': if (direction !== 'right') direction = 'left'; break;
        case 'ArrowRight': if (direction !== 'left') direction = 'right'; break;
    }
});

startGame(); // Start the game when page loads
This JavaScript code is the heart of our game. Here’s a simplified explanation:
- Initialization:
- Gets the canvas element and its 2D rendering context.
- Defines
gridSizefor cell dimensions. - Sets initial
snakeposition,foodobject,direction,score, andgameLoopvariable.
generateFood(): Randomly places food within the canvas grid.draw(): Clears the canvas and redraws the background, food, snake, and score in each frame.update(): Updates the game state:- Moves the snake head in the current
direction. - Checks for collisions with walls or itself, triggering
gameOver()if needed. - Handles snake eating food, increasing the
scoreand generating new food. - Removes the tail segment to simulate movement unless food is eaten.
- Moves the snake head in the current
gameOver(): Stops the game loop, displays an alert with the final score, and resets the game for a fresh start.startGame(): Initializes the game by generating food and starting thegameLoopwhich repeatedly callsupdate()anddraw()at a set interval (game speed).- Event Listener: Listens for keyboard arrow key presses to change the snake’s
direction.
Running Your Snake Game
- Save: Save your
snake.htmlfile. - Open in Browser: Open the
snake.htmlfile in your web browser (e.g., by double-clicking the file or dragging it into your browser window).
You should now see your simple Snake game running in your browser! Use the arrow keys to control the snake and try to eat the red food blocks to grow longer and increase your score. Be careful not to hit the walls or yourself!
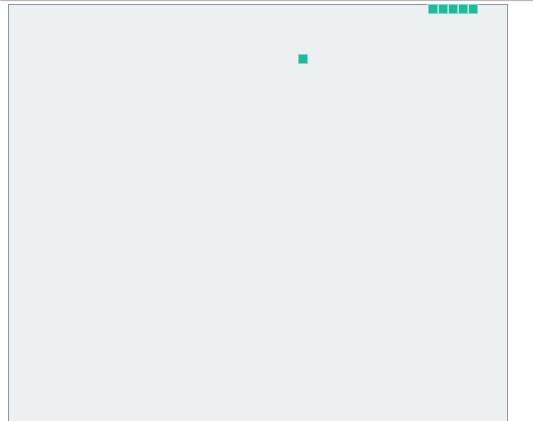 Playable Snake game created using HTML, CSS, and JavaScript in a web browser.
Conclusion
Congratulations! You’ve created your first simple game using HTML, CSS, and JavaScript. This tutorial provides a basic foundation for HTML game development. From here, you can expand on this game by adding features like:
- More complex levels
- Different food types
- Sound effects
- Scoreboards and high scores
Keep experimenting and exploring the possibilities of game development with web technologies!